Monday, July 19, 2010

Light Up Your Life


Lighting is the icing on the cake when it comes to a complete look for a room. For that reason, take careful consideration when planning and purchasing your lighting.

Floor lamps, recessed, chandeliers, table lamps, sconces, task lighting: these are the typical options for brightening up a space. Where do you begin? What type of lighting is best for each room and what should you keep in mind when planning? Of course, beauty and aesthetics are vital, but functionality is equally important. Proper lighting allows you to read, prepare meals, eat dinner, or simply have a level of safety by illuminating a dark stairway. Here are a few simple rules that will help you in choosing the perfect “icing” for your “cake.”

Every space in your home will require different lighting; however, there are basic “rules” that will apply to any space. First, make sure that the size of your fixture is appropriate for the room and/or furniture piece that you have underneath or beside it. You’ll also want to make certain that there is enough light for your needs. For instance, some ceiling mount fixtures might only have one bulb capabilities, whereas you might need much more lighting than that, so think about what you will be lighting and how much light it will require. Next, along the same school of thought as size, choose a fixture that doesn’t hang too far over an area that will have a lot of traffic. You don’t want someone bumping their head every time she enters your home.

What is Your Choice?

Another consideration is the bulb itself. CFL’s (compact fluorescent light bulbs) are everywhere these days. These bulbs are a great way to save on energy costs, but can produce light that can actually change the way that a room looks by casting a somewhat harsher, sometimes "bluer" light. Incandescent bulbs, though slowly fading in popularity, are a better choice when soft, warm light is the goal-especially when dimming over a dining table or anywhere that you want to create a romantic or subdued mood.


I have purchased dimmable CFL’s but they are still not equivalent to incandescent dimming capabilities. The newest lighting source is LED lighting. In my opinion, there are limited designs where this type of lighting will work, so I won't dwell on it, but I did want to mention it. 

Next, make sure that your lighting is in the similar style as the rest of your décor (or not, if that is the goal). Either way, just don’t grab a “generic” fixture to fill a space, think about what you love and what works with the style of your room. Break free from the “model house” look that is oh so standard. Who wants to be standard!? :)

Your foyer or entrance way is the first impression that guests have when they enter your home, so I like to add a little wow factor in that area. A small chandelier is great for a small entryway, while a huge foyer demands a larger fixture. No matter what the size, I say think grand and choose a light that garners attention.


Keep safety in mind when lighting a stairway or hallway. Ceiling mount fixtures or recessed lights work great in these areas, just make sure that it is enough to actually get your though the area without tripping. Also, think about a 3 way switch that allows you to turn on/off the light from both ends of stairway or hall.


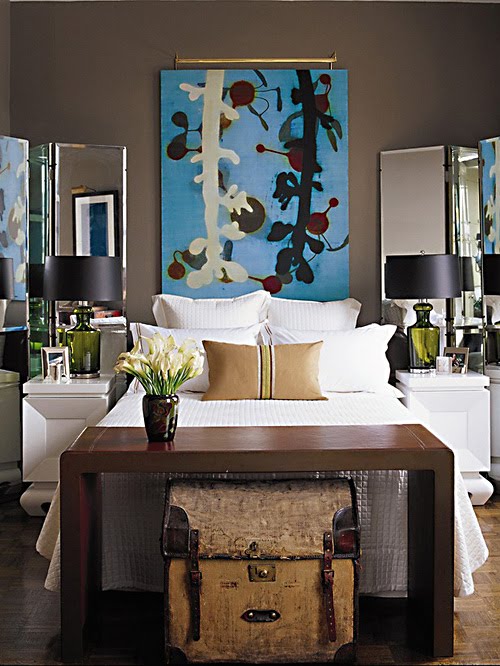
In the kitchen, task lighting is key as you will be cutting, chopping, measuring and even entertaining (we all know everyone ends up in the kitchen at some point in the evening).  Recessed lights are appropriate here, but make sure that they are centered over the area that you are lighting. The only drawback from recessed or can lights is that you actually lose a little light as they are more directional lighting rather than lighting that will “fill” up a space. I prefer to use a combination of both recessed and some sort of ceiling mounted light. Adjustable recessed lights are also a great way to feature a furniture piece or artwork in any room.  Bar areas are great for adding a little pop of color or interest with beautiful pendant lights. 


Other simple ways to add more lighting and drama to a space is of course, table lamps, floor lamps, candles (love!), and even wall sconces that use candles and not electricity.  I have to admit, I have an addiction to all things lighting, so I have a collection of lights that I buy when they catch my eye. I might not use them today or next week, but I will eventually use them, especially if I want a quick change one day.  Most of all, just remember to take the time to choose the right lighting for your home. Nothing will make a fabulous space look worse than inappropriate lighting; it’s an easy update for a room and will surely brighten your life!

'Till next time…

Saturday, June 19, 2010

The Ease of the Folding Screen

It’s time for another installment of one of my favorite things. Items under this label are stylish and easy to incorporate into your homes while, at the same time, making a big impact.
Today, I want to share some thoughts on folding screens. Of course, these have been around forever, but the options for folding screens are endless these days. First, let me tell you why I love them. Folding screens can instantly give a room a focal point, hide unsightly views, visually divide an open space, add a bit of architecture, can create a headboard for your bed, and most importantly, set up in a minute!


I have found that another great use for screens or room dividers is to separate the entrance way into a large room; sort of giving you an instant foyer. A lot of homes have you walking right into the living room, and I personally, prefer a little buffer between my living space and the front door. Pop up a screen there and maybe add a plant in front of it to differentiate between your entryway and the living room.

Folding screens come in countless varieties. If you’re a DIYer, you might choose homemade ones with simple solid pieces of wood, or for a casual look, simply hinge three large house shutters together. Here is a how-to courtesy of This Old House:


Of course, screens are also available in rich finishes and exotic woods, but you don’t have to spend a lot to achieve the same look.


Folding screens come in all shapes, sizes and prices, so there is definitely one out there in your budget and style.


Let me first talk about some more ideas for inexpensive folding screens. Again, they will all be hinged with simple hinges with at least 3 panels each. Here are some objects that will make great folding screens:

Hollow core doors (or paneled closet doors), house shutters, reclaimed wood, lattice, fabric panels stretched across a simple wood frame, large mirrors, large wooden windows…well, you get the idea. Basically, anything that is somewhat sturdy, is tall enough for your use, and can be hinged, will work! If you’re artistic (and I just KNOW that you are) you can paint a mural, stencil, etc, on the screen for an even more custom look.


Now, if you’re in a hurry or just not feeling that crafty, just buy yourself one already made. Again, folding screens come in all shapes, sizes and prices, so there is definitely one out there in your budget and style. There are even "screens" made of dried branches and plants. They don't hide very much, but visually, are beautiful.


Elle Décor recently did a spread on the "Top 10" favorite folding screens. Here are some images from that feature:


So look around and see if there is an area in your home that needs some pizazz or something that just needs to be hidden.  Either way, a folding screen will be your best friend.
'Till Next Time....


Tuesday, June 8, 2010

Easy Wall Striping Technique

Some walls just need a little something to make them stand out from the rest of the room. While you all know that I love wallpaper, it isn't always the answer (did I just say that?!?). So here is an easy DIY technique that I have used many times before. This time, however, I remembered to take pictures to share with you :)

Supplies Needed:
2 types of same color paint: 1 Satin or Flat and 1 Semi-Gloss (or High-Gloss if available)
*You will need more of the base coat of paint than you will need of the striped glossier color*
Painter's Tape
Level
Pencil
Clear Painter's Glaze (if necessary for textured walls)


First, make sure that your wall is dust free and cleaned before you paint the base coat of paint (your satin or flat paint). You will also need to analyze the wall to check for imperfections that can be fixed such as small holes or cracks. Some walls, especially newer homes have a "knock down" effect or some other sort of texture on them; don't worry, these walls can still be striped, but there is just one extra step to take which I'll get to in a minute. The wall below, was very textured as well, but turned out just great.


Secondly, decide how wide you would like your stripes and in which direction. I chose to create horizontal stripes on these walls as they are in the foyer of a client's home and I wanted to lead the eye in to the living area, however, vertical stripes would have looked good too. Totally your call. For the width, you can use equal distances or even vary each stripe a little, such as one wide and one narrow. I chose to create equal distances and just measured the height of the wall and divided into the general width that I wanted: approximately 8 1/8 inch wide. Make sure to place your tape on either side of the lines to leave open the area to be painted (looks like you have varying widths but you won't)

Next, measure and mark your stripes lightly with a pencil and use a large level to continue a level, straight line around the wall. Do this for each strip until you are finished laying it out. If you have a keen eye, you can get away with simply putting a small mark on the wall at each end and then aligning the painter's tape to each mark, but this has more chance of having an unlevel line.


You will then add the painter's tape to the lines. I like to place the tape just UNDER the pencil mark so that when I paint over the tape, it will also cover my lines.

Here is the extra step to take if you have textured walls: BEFORE you paint the stripe, apply a clear coat of glaze to each taped area. The glaze will dry and seal the tape and prevent any paint from seeping down behind the tape and leaving an uneven line. Give the glaze enough time to dry before painting the next coat.


Now you are ready to paint the stripes. For each taped off area, you will now apply the semi gloss (or high gloss if that's the case).


Finally, remove the painter's tape. I like to remove it before the paint has completely dried so that the tape is easier to remove.

Voila! Striped Walls!


*Note: Of course, you can vary this technique to suit your decor by using different color paints, faux finishing the inside of the striped area, etc. but the basic rules will still apply*

Friday, May 28, 2010

Sometimes you just want to change the look of your home without an all day trip to the mall or home improvement store. You’re looking for a new feel to your space without spending all weekend or even all day. So in recognition of Memorial Day weekend and the kickoff to summer, let’s talk about some quick and simple ways to spruce up your home without breaking the bank while still having time to fire up the grill.
If you have neutral color palette to your room, it will be even easier to make some changes. However, even if you do not have neutral walls and furniture, you can still apply these ideas.


Throw Pillows: Possibly THE easiest way to dress up a couch, bed, or chair is to add a throw pillow (or better yet several!) I like to change with the seasons, so think along those lines for color inspiration. Bright or pastel colors for spring and summer, earthtones for fall and deep warm tones for winter. Also don’t forget to mix and match patterns with solids. Don’t buy all of the same pattern or texture, mix it up with a large pattern paired with a small check or solid. I like to use pillows in the same color family or sometimes, contrasting colors, such as aqua blue and light orange, for instance. Either way you go, throw some pillows down and see what you think. The next best part about pillows: if you’re not happy with the ones you bought, just exchange them for the right ones.


Plants: Plants can easily change the tone of a room from stuffy and sterile to warm and inviting. Don’t over do it, we don’t want to look like Little Shop of Horrors, but just enough to compliment your space. Don’t forget a beautiful container to coordinate with your room. Here is another chance to bring in color and even texture to an otherwise neutral room.


Window Treatments: For a bit more time, you can change the curtains in your room. Maybe you want to evoke the feel of your favorite hotel room in the Caribbean and just use sheers in your bedroom. Maybe you’re looking to make your dining room more formal and therefore choose a sophisticated pattern. Maybe you don’t want curtains at all and opt for a beautiful roman shade or sliding panels. As you can see, the options are endless, but don’t underestimate the power of window treatments to transform a room. For another change, replace the drapery hardware; the options are endless here too!


Area Rugs: If you have a bare floor, area rugs are a super easy way to ground your space.

If you have rugs down already, think about changing them out periodically. You’ll not only end up with a different look, but also reduce the wear and tear on your floor decor.


Lamp Shades: Purchase new ones with exciting colors and patterns or if you’re feeling really “Martha Stewarty,” recover or repaint your existing ones. Just be cautious not to get a really thick fabric or your light will be dimmed.


One quick idea: Add a beautiful throw blanket to the corner of a sofa or chair. It instantly adds color and texture and works great to soften hard edges. It also encourages cuddling :)
*Oh, and don't forget the outside. Many of these same techniques will give new life to a dull patio or porch.

Obviously, these are just a few ways to make simple changes, but all very effective. So look around and see what you can tweak this weekend. If you’re like me, you have a closet full of items just waiting to be used! Happy Memorial Day!

Till next time….